With very little effort I recently implemented a home streaming video environment. It is pretty slick having an at-home multimedia hub for movies, music, and photos. Since then, a few people have asked me what steps I took. If you have an existing WIFI-enabled home then you can stream video and music to almost any display with a few extra ingredients.
Here’s are the two main ingredients for just under $500. Since time is also a commodity, I’d say there is about 2 hours of manual work, and 10-12 hours (depending on the size of the disk space) of time needed by devices to build themselves (overnight if you can swing it).
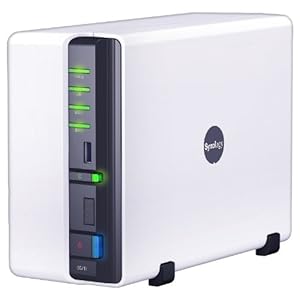
1. One (1) NAS Device ($300) – Network Area Storage, otherwise known as a NAS device, is basically a mini-computer with a set of hard drives, usually two or more for redundancy in case one drive fails. I went with the Synology DS209 that supports two drives and a streaming media software service that runs on the device. If the DS209 is no longer available, then I recommend another 2-Bay Synology NAS like the DS211 (shown below).
2. Two (2) Identical Hard Drives ($80 each) – These two drives are installed in the new NAS you just purchased. Without these, the NAS device is just an empty shell. Both drives must be identical for optimal reliability and compatible with the NAS manufacturer’s requirements. In my case, I found on Synology’s web site that the Western Digital 2 Terabyte disks I was drooling over were indeed compatible. If you have a moderate-sized media library then I recommend 1 Terabyte disks. 2 Terabytes is a lot of disk space and can be a waste if you don’t have the library to use it.

After these two ingredients arrive, you must follow the hardware assembly instructions provided by the NAS manufacturer. For the Synology DS209, things were very straight forward and all I needed in addition to the parts provided was a screwdriver.
Now that you have the hard drives plugged in, the hardware portion is mainly complete. Now its up to the software. Again, Synology has this covered if you choose that device. They provide a well documented set of instructions on the software CD that accompanies the NAS device, as well as a wiki site. I highly recommend following the instructions on the Synology CD provided with the NAS. The companion software CD typically has an “Assistant” application you can load on your home computer so you can configure the NAS through a USB cable. That assistant software is necessary to interface with the NAS device since the server operating system is probably not configured yet.
After you have installed the companion CD’s software, continue to follow the manufacturer’s instructions to turn on and interface with the NAS for the first time. Many NAS devices have a UNIX or Linux style interface. Synology’s DiskStation Manager version 3.0 (DSM 3.0) looks similar to Fedora in that it has a desktop look and feel which you can eventually load from your desktop browser later on.
Once you go through the initial set up, you will need to create at least one RAID volume – an allocated section of both hard drives that will be formatted and prepared for file storage use. RAID is an important addition as it creates a level of redundancy in case one of the disks fails. Once again, Synology has you covered with its documentation and with two disks you can create a RAID-1 or mirror, where both disks contain the same exact same data. Creating a RAID-1 volume as large as 1 Terabyte or 2 Terabytes can take several hours so I recommend doing these steps in the evening and let the volume build overnight.
Once the volume is complete you’ve got your location for storing tons and tons of digital goodies. You will need to share the volume and thats where the fun begins. If you’re looking to just use the NAS for storage then the administrative console will provide you with options to “share” the volume on the network. If you work in an office environment then its highly likely that you have seen this options before with a mapped drive or used \\servername\share to get to your company files. However, if you want to streaming media then many consumer NAS devices have a Digital Media Server service. Synology have a very easy to use service that is basically set-it-and-forget-it. It supports Digital Living Network Alliance (DLNA) streaming and really puts the frosting on your 2 Terabyte cupcake you just powered on.

Enable the media server from the control panel (in Synology DiskStation, its literally that easy) and you’ve got a places to put your video, music, and other content. How you stream that content to your computer, IPad, IPhone, TV, Xbox, etc remains to be discussed, so I’ll write up another article shortly.